

Preparation – To insure a quick start to your fermentation and help protect against contamination and infection, it is a good idea to make a yeast starter. Some say it’s especially effective if you’re using a freeze dried yeast, harvested a culture from a previous brew, using bigger commercially available yeasts such as White Labs or W’yeast, or brewing a particularly large batch of beer. If you ask me, I think that covers most scenarios for the home brewer and a yeast starter should be made every time. It can only help. That is assuming that you are careful not to contaminate your starter, which I’m sure you will be.
You’ll want to make your yeast starter at least a day before brewing. This will allow enough time for the yeast to feed upon the lovely sugars and build up a good layer of ever hungry yeast on the bottom of your container. When you are ready to make your yeast starter, gather the following items:
- • Plastic or Glass jug – one quart to a gallon is fine. Glass better, but I’m using a well cleaned and sanitized plastic veggy oil container.
- • Dry Malt Extract – light/dark doesn’t matter. There won’t be enough to affect your final brew.
- • Small sauce pan and lid
- • Airlock
- • Rubber Stopper that fits your glass jug
- • Sanitizer – I use concentrated iodine
- • Small Thermometer
- • Yeast (if using liquid yeast, you should make sure you remove it from the fridge and have it at room temperature)
- • Funnel (optional) – I use one, although it does add another possibility for contamination
- • Vodka or boiled then cooled water

Sanitize – Making a yeast starter is just like brewing a regular batch of beer, only you’re not interested in anything but providing lots of sugar for the yeast to feed on. Which is why we’re only useing some dried malt extract, water and yeast. Now before you begin, remember, everything that touches the wort after the boil must be sanitized. This includes the jug, airlock, cap, rubber stopper, thermometer, and funnel if you are using one. Sanitize these with a commercial sanitizer. I use a concentrated iodine solution. The pan and lit don’t necessarily need to be sanitized since the boil will do the job, but I do it just to be extra safe.
* As a note, I often put some sanitizing solution on a place as a place to put things like the thermometer and mixing spoon that are used more than once.


if you get bored waiting, you can peel labels off of your jug.
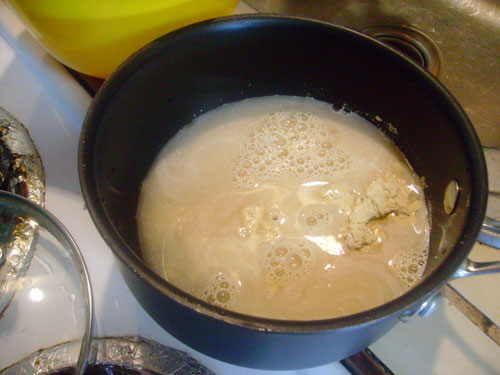
Wort – Now that all your equipment is sanitized, you’ll need to make the wort. Put half a cup of dried malt extract into your sauce pan then add about a cup of water. Boil for a couple of minutes to make sure it’s sanitized keeping the lid on as much as possible to prevent too much evaporation. Watch out for boil overs!
")


If you stand and watch it, the 20 minutes goes faster.
Cool – After about 20 minutes you’re going to have to cool the wort to your target temperature. Be sure to keep the lid on your sauce pan except for checking the temperature to keep out contaminants. On the same note, also make sure your thermometer is sanitized before putting it in the wort. To determine the correct temperature for pitching the yeast, you can do one of two things: check the recommendations on the yeast package or shoot for 60 – 72 degrees Fahrenheit for ales and 46 – 55 degrees Fahrenheit for lagers. Either way, you should make sure you pitch the yeast at the same temperature your beer will be fermenting at. So if you plan on placing your fermenters in your basement where it’s 65?, then that is the temp you should pitch your starter yeast at.

Contain – When the wort is cooled to the optimum temperature and the jug is sanitized, carefully pour the wort in. If you plan on using, and have sanitized one, this would be the time to use that funnel.

Yeast – You may now add the yeast.

Airlock – Put the airlock in the stopper and the stopper in the jug. Carefully agitate the wort so it will be properly aerated. You can do this by gently shaking the jug. Don’t be afraid to swish it around a bit. Just don’t get carried away.

Protect – Fill the airlock halfway with vodka – protects against contamination – or boiled then cooled water.

Cap – Cap the airlock. Place and keep the jug in a dark place that matches the yeast’s temperature requirements.

Ferment – In a day or less you should start to see active fermentation. The airlock will bubble and if you’re as excited about beer as I am, you’ll stare at the jug just to watch it bubble. Don’t get worried if you don’t see high krausen, the billowing clumps of foam that form during regular fermentation with a full batch. The important thing is that after a bit of that bubbling you will start to see some deposit of yeast at the bottom of the jug. This deposit will keep increasing in size. By brew day you should have a thick layer of eager yeast, ready to give your beer a head start. When pitching into you’re full batch, make sure to get all of that yeast into your wort.
Using a yeast starter like this will produce fermentation in less than a day, sometimes even hours after adding. Good luck and happy brewing!